Sunday, 9 February 2014

Chocolate Mud Cake

This chocolate cake recipe has been something that has been tried and tested on many family and friends. I love a good chocolate cake but think after a day or two they always go dry and they need to be moist and gooey. When i think of chocolate cake I always think of the Miss Trunchbull's chocolate cake in Roald Dahl's 'Matilda'. So I promise this is a chocolate cake that is moist, worthy of any Roald Dahl novel and only gets better the longer you leave it!
At the weekend my little sister turned 21 and, being a talented baker herself, i knew a Victoria Sponge just wouldn't cut it. This cake is very dense like a brownie so only needs a bit of icing on the outside. I covered the cake in a glossy chocolate fudge icing and decorated with; cherries, strawberries, truffles, macadamia nuts, lavender and homemade pineapple flowers. 

For the sponge you will need:
9" round tin,
220g unsalted butter,
220g Dark chocolate,
25g instant coffee granules,
125g Self Raising flour,
125g Plain flour,
50g Cocoa powder,
1/2 tsp Bicarbonate powder,
480g Golden caster sugar,
4 Eggs Beaten,
7 tspns Full of Vegetable oil,
100ml Butter milk. 

For the icing:
115g butter
85g cocoa 
340g icing sugar
150ml skimmed milk

1. Place your butter and dark chocolate in a glass bowl over a saucepan of simmering water. Add 160ml of hot water to your coffee granules and then add the coffee to your chocolate and butter mixture until everything is melted and mixed in.

2. Combine all of your dry ingredients and make a well in the middle and pour in your coffee chocolate mixture. Gentle mix until everything is mixed in and resembles a batter consistency. Seperately beat your eggs, vegetable oil and buttermilk mixture together and then add to your cake batter.  Once the mixture is smooth and all ingredients are combined pour into your pre-lined tin.

3. I would recommended lining your cake tin with two layers of baking parchment and on the outside tie a layer of newspaper round your tin with string. The reason for this is your cake has a large amount of sugar and this means the cake is prone to burning but by lining your cake in this way it should prevent the cake from catching.

4. Bake your cake at 165° for 45 minutes and turn your cake to prevent burning. Bake for a further 35 minutes or until cooked all the way through. Test this by using a metal skewer, you will know your cake is cooked when your skewer comes out clean when piercing into the center of the cake. Now leave until the cake is completely cooked.

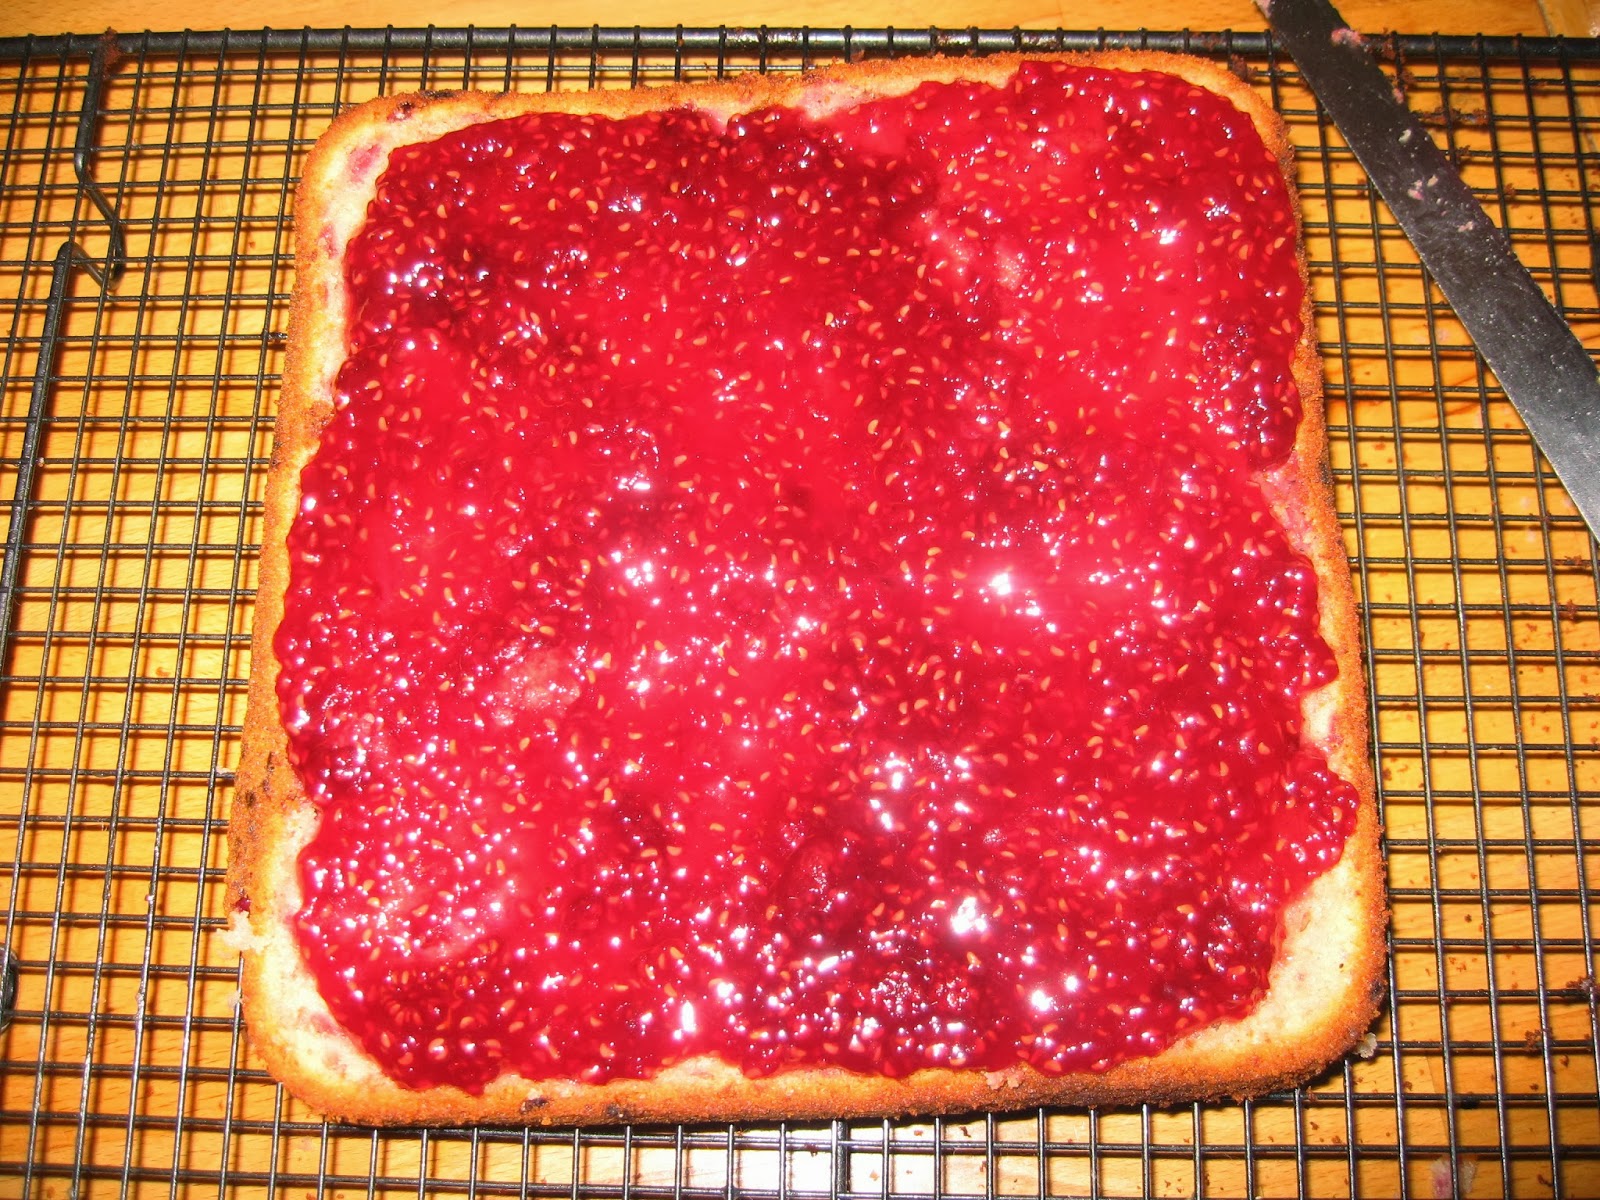
5. In the meantime to make your icing, add your melted butter to your cocoa powder and icing sugar and gradually add your milk until the mixture is smooth and thick but not too thin. You want a heavy thick consistency that you can spread and push over your cake until it is completely covered. Whilst the icing is still wet add whatever toppings you would like to cover your cake, because the icing is still wet it will allow your toppings of your cake to stick on firmly. 

As part of making this cake I made my own pineapple flowers which are very pretty and easy to make. The recipe for these will be appearing on my blog shortly! As ever this recipe is very simple to make and is sure to make an impression on anyone who eats it. After discovering this recipe i have never been tempted to use any other recipe to make chocolate cake. Any questions please feel free to get in touch and would love to hear from anyone who has had a go, Happy Baking!


Tuesday, 26 November 2013

Cherry Brandy Dark Chocolate Brownies

I love a good brownie but i can not tell you my disappointment when i bite into a brownie and it is dry and cakey. A good brownie should be stupidly rich, dark and gooey. I am not one for blondies or brownies that are too sweet, the darker the better. I have used my recipe for brownies and changed it again by adding some booze and fresh cherries to make them taste even better!
Some of my other bakes have looked elegant and photographed beautifully but it is difficult to photograph a gooey lump of chocolate and make it look elegant. I did decorate them with a pinch of red glitter to give them the festive edge but the selling point to these brownies really is the taste.

You will need:
185g unsalted butter
185g good quality dark chocolate
275g Light brown sugar
80g Ground Almonds
50g Plain flour
3 Large eggs
200ml Cherry Brandy
200g Fresh Cherries
100g Milk chocolate


1. Firstly stone your cherries and place in a saucepan on a simmering heat along with your Cherry Brandy. This will cook off the alcohol but marinates your cherries in a lovely boozy flavour. Leave these to one side until they are cool.

2. Now melt your dark chocolate and unsalted butter in a heatproof bowl over a saucepan until your chocolate and butter is melted, then leave to one side. Once cool add this to your flour, almonds, eggs, sugar.

3. Finally add in chunks of your milk chocolate and your Cherry Brandy mixture and gently stir in until you have a smooth consistency. Pour your mixture into a lined square tin. Use a deeper smaller tin if you want deeper brownies. Bake at 180 for 30 minutes or until a crust appears on top and it is firm to touch.

4. Remove from your tin and leave until completely cool before you cut them up. These brownies are amazing warm with some fresh whipped or chantilly cream or a little creme fraiche.

These are another example of bakes that would make good christmas gifts. Wrap in cellophane with red ribbon and make some home made gifts tags with a sprig of holly and give to incredibly grateful family and friends. 

Northern Italian Chocolate and Nut Cake

As promised, here is my first christmas bake. I saw this recipe in a magazine a while ago and it has been on my to-do list! Although it is not a bake it is a non-cook cake, traditional to the region of Siena. Having researched the recipe, it appears that traditionally this cake is made with candied peel but i have decided to use crystalised ginger instead which i think compliments the nuts and Amaretto nicely!
What is ideal about this cake is all  you have to do is bung all the ingredients in together and leave it to set. This cake is very rich so you could easily make a smaller version and wrap it in brown paper and give it as a gift at christmas. 

For the Cake you will need:

250g of good quality dark chocolate (70% cocoa or more)
3 Medium egg whites
100g Crystalised ginger
200g Ground Almonds
100g Finely chopped Walnuts
50g Finely chopped Hazelnuts
200g Icing Sugar
4 Tbsp Amaretto

For the topping:
100g good quality dark chocolate
75g icing sugar, plus extra to dust


1. Line your tin, i have used an 18cm deep oven dish, with cling film and leave to one side. To make your cake melt the chocolate in a large heat proof bowl over a saucepan of bowling water, make sure the water is not touching your glass bowl. Once melted, leave your bowl to one side.

2. Meanwhile, lightly beat your egg whites with a fork for a couple of minutes and to this add your ginger, ground almonds, nuts, icing sugar and Amaretto.  Mix well and then add your chocolate and continue to stir until all your ingredients are mixed in. Pour your mixture into your lined dish and pop into your fridge until set.
3. In the meantime, to make the topping, melt your dark chocolate and add to your icing sugar and mix together. Turn your cake out onto a plate once set and use a spatula to cover the surface of your cake with your topping and once again leave to chill until set. Finally dust your cake with icing sugar or however you wish you decorate it, and enjoy at your leisure! This cake is very rich so you can cut your cake into 16 generous slices and not leave anyone feeling short changed.

I hope you enjoy this Italian classic as much as i do. I have made this recipe a couple of times and i find that this cake is perfect for an afternoon treat with a nice cup of strong coffee. Because this recipe is so simple you could add whatever you like, sour cherries would be a lovely combination with the nuts and ginger. Why not try this for christmas as a nice alternative!


Sunday, 24 November 2013

Twelve Bakes of Christmas

My thoughts on the idea of tradition in food at Christmas, as well as my ideas for 12 Christmas Bakes!

I have never been part of a family who has used christmas to spend lots of money. Last year i made lots of homemade chutneys and jams, whilst my sister made homemade biscuits and it went down very well with friends and family. Christmas has always been pretty simplistic and traditional in my house, most importantly we can always guarantee that we will all be in the house, at the same time for one whole day. One thing that does not remain traditional in my house, is the food. I would argue that this is the case for many family homes in the UK.
Me and my little sister on Christmas day!

With the enormity of Italian cookbooks that have been published in the last three years, it appears that people's tastes are veering towards foods such as pannatone for christmas. Food that differs from your conventional british sunday roast and christmas pudding is instantly elevated to something that appears to be more special. When Marks and Spencers advertise their christmas produce there will always be a twist on a traditional classic. Lets be honest most of us will be seduced by the idea of orange and cranberry stuffing over the traditional.                                    

  The first time i felt christmassy last year was when i went to a local pub, after a walk in the freezing cold, and had mulled cider and a slice of stollen. It was nice to see a traditional norfolk pub serving this traditional chrismas german bread. It is amazing how the spices and fruit from the Stollen and the mulled cider, evoked more feelings of christmas than a roast turkey ever could. I didn't even know what Stollen was when i ordered it but it seemed instantly more appealing because it was different to the usual foods available at christmas.

Whilst flicking through my mum's recipe books for inspiration for some christmas bakes i stumbled upon a recipe for sticky ginger pudding cake. This recipe has been a staple in my house for years and is
Sticky Ginger Cake c/o 'Puddings and Desserts' by
Elizabeth Pomeroy
a particular christmas favourite. I almost didn't recognise it in its original 70s form, covered in whipped cream and glace cherries. Delving further into the cook book i found some really lovely ideas that would be perfect for christmas. I think the trap that we commonly fall into is sticking to what we know but we often forget that there are so many twists and new ideas that make christmas dinners instantly more exciting. There is always an archive for forgotten and amazing recipes hidden in old fashioned recipe books, it is always good to know the basics before jumping in trying to create something completely different.

This christmas i will be endeavouring to stay away from recipes that promise something completely new but draw upon the classics within Europe and add a few twists. The older recipes are the best, but it is just a case of adapting them or changing them to suit your tastes. For those of you who are not overwhelmed by traditional british puddings, i will re-introduce you to them in a way that give you more ideas for your christmas day. So keep your eyes peeled for my 12 bakes of christmas over the next 4 weeks!


* My 12 Bakes of Christmas *

Northern Italian Chocolate and Nut Cake

Sticky Ginger Cake with Salted Caramel Ice Cream

Pumpkin Christmas Bread with Spiced Fig Jam

Christmas Sundae with Mulled wine sorbet and brown sugar meringues

Stollen with Mulled Cider

Binham Blue and Walnut Filo Wreath 

'Better than Meat' Veggie Sausage rolls 

Stained Glass Window Biscuits


Chilli and Ginger Jam with Fig Biscotti 

Cinnamon and Hazelnut Monkey Bread 

Plum and Cranberry Fruit Pie

Cherry Brandy Chocolate Brownies 


My Cranberry and Orange Crumble Cake made for Christmas last year!

Tuesday, 5 November 2013

Orange Rose and Pistachio Cake

My lovely neighbour Sharon turned 50 this week and i have used the orange curd i made last week to create her a very special birthday cake. Orange, rose and Pistachio are very traditional flavours  in turkish cuisine but there is no reason why these amazing flavours can not be transfered into a very traditionally british sandwich cake. 
This cake does take a little more care and attention than my other recipes but is completely worth the time! Simply decorated with ground pistachios and crystalised rose petals ( ridiculously simple to make!), it makes a big impression against cream cheese icing with a touch of rose water. 

For the sponge you will need:
400g melted butter
2 whole medium oranges
400g light brown caster sugar
6 eggs
150g ground almonds
350g Self Raising Flour

For the decoration:
250g Full fat cream cheese
250g Mascapone
200g icing sugar
100g pistachio (without their shells)
1 tsp rose water
Rose petals
1 egg white
150g caster sugar
Orange curd ( one you prepared earlier!)

1. First things first, you can't have a beautifully moist and zesty orange cake without fresh oranges. So, place your two oranges in a saucepan of boiling water and boil on the heat for an hour. Make sure the oranges are constantly covered in water so that the oranges are cooked through. Do not peel the oranges, we want all of the lovely zest from the skin! Once cooked leave to cool ready for blitzing later.

2. Combine your melted butter with your brown sugar and then liquidise your two oranges, strain the stringy bits and add to the butter and sugar. Now whisk all of your eggs together until they become creamy and form stiff peaks. With a spatular gently combine the butter mixture to your eggs, do not mix too vigorously as this will beat out the air from your egg mixture.

3. Now weigh out your flour and combine with the ground almonds, once again gently combine to your egg mixture mixing enough to ensure all of your ingredients are mixed in. Now divide your cake mixture into 2 and pour into pre-lined sandwich tins and bake at 170 for 40 minutes or until cooked all the way through. 

4. Once your cakes are cooled slice each sandwich half in half again so you are left with 4 bits of cake in total. Now, place the bottom of the cake on a plate and generously layer with orange curd before placing cake layer number two on top. Cover layer number 2 with orange curd and layer number 3, leaving the top layer bare to cover with cream cheese icing.

5. I have always had a complete nightmare with cream cheese icing as it always goes runny but i promise that if you combine full fat cream cheese with mascapone and icing sugar to taste, your mixture will stay firm. Add one tsp of rose water to give it a little extra flavour which will go perfectly with the orange and pistachio. Put all of your icing on top of your cake and with a knife push the icing across and around the cake until it is evenly covered. 
6. To make crystalised rose petals pick some roses from your garden  or source some from somewhere that grows their roses without any pesticides. Lightly beat your egg white with a fork and then dip each rose petal in the egg whites and then sprinkle with caster sugar and leave on baking parchment to crystalise. This can be done days before you make and decorate your cake but if you want to do it on the day allow 2-3 hours for the rose petals to crystalise.

7. Finally roughly chop your pistachios or blitz in a food processor, make sure they still have lots of texture and are not too finely ground. generously sprinkle these over the top of your cake and arrange your rose petals to make it look like they have delicately fallen on top. Leave in the fridge to firm up but make sure you take it out in time before you serve as nobody likes cold cake!

Tuesday, 29 October 2013

Orange Curd


I honestly think i could eat lemon curd on its own and the other day was sorely tempted! My neighbour is turning 50 next week and i have decided to make her a special cake. Without ruining what i will be making, i can say that my curd will be used in my sandwich cake. However, i will not be using my favourite lemon, but creating orange curd. 
This curd is very sweet and unless you have a very sweet tooth you may not wish to spread it on your crumpets in the morning! Despite this, it would be amazing drizzled over a pavola with mulled autumn fruits or poured over rum ice-cream. As with all my recipes, it is incredibly easy to make and a great way to use up oranges and lemons nearing the end of their shelf life.

You will need :
The zest and juice 2 large oranges
The zest and juice of 1 medium lemon
225g caster sugar
110g unsalted butter
3 large beaten egg yolks
This makes 450g (1lb)

1. Heat the sugar, butter, orange juice and zest and lemon in a glass bowl over a simmering saucepan of water. Remember to not overfill your saucepan with water, you do not want the bottom of your glass bowl to be in contact with the water.

2. Once the sugar and butter have melted, add your egg yolks and constantly whisk your mixture to prevent any egg cooking in lumps, ensuring a smooth consistency to your curd. You will find that the mixture becomes slightly creamy and lighter in colour as the mixture begins to thicken. You will need to continue to whisk your mixture for approximately 20 minutes or until the mixture coats the back of a spoon.

3. Once you're mixture reaches the right consistency, remove from the heat and strain through a sift. Now pour into a jam jar and once cooled secure the lid and place in a fridge to set. This curd will keep up to a month so once put in a fridge do not forget to label and date.


Last Christmas i decided to make Lemon Curd, Apple and Cranberry Chutney and ginger and Chili Jam for friends and family. As you can see this does not take long to make but with home made labels and jam covers it would be a really lovely gift in a hamper for friends and family. 

Sunday, 22 September 2013

Norfolk Raspberry Bakewell Cake

This week celebrated the point in the year when my parents finally decided that the weather had cooled enough to put our aga back on...hoorah! I have spent the whole summer without an oven and as a result have done very little baking outside of work. Over the summer i have been thinking up different recipes for 'Cake of the Week', at the Cafe. As well as; Orange, Rose and pistachio cake, Blueberry and Apple Crumble Cake, i also created a Norfolk Raspberry Bakewell Cake. 

As well as being a damn good cake, it also managed to win over the grumpiest fisherman in my town. He came into the Cafe everyday for a week to have a slice and has asked me to make one for him, which pleased me greatly! If you are still unsure whether to try this recipe i can promise you this is the most ridiculously easy recipe. I have designed this cake like a victoria sponge but thought it looked especially nice baked in a square tin. Cut this cake into 12, if you are generous enough to share, and this will leave you with 12 hefty fingers of cake. 

You will need:
6 medium eggs
400g self raising flour
400g golden caster sugar (or light brown sugar will do!)
400g stork (or softened butter)
3 tsp of almond essence
300g of raspberries ( I have used fresh Norfolk raspberries but frozen are much much cheaper and available all year round from supermarkets)
1 jar of raspberry jam
A handful of flaked almonds
50g icing sugar
A squeeze of lemon juice


1. First of all cream together your sugar and your stork until completely mixed together. Weigh out your self raising flour and add 1/3 of this to your sugar and butter along with 2 of the eggs. Fold your eggs and flour into the mixture, once mixed repeat the process until all of your eggs and flour has been mixed in.

2. Now is the time to add the almond essence and 200g of the raspberries into your cake mixture. If you  have been using a Kitchen Aid or hand whisk i would recommend swapping to a wooden spoon or spatular in order to gently fold in the essence and raspberries without breaking up the raspberries too much.

3. Spoon out your mixture into your ready lined square tin and use your spatular to level the top in order to create an even bake. Scatter the remaining raspberries and flaked almonds on top of your cake and then bake your cake at 165 for 1 hour. Depending on your oven it may take slightly more than an hour but don't forget to use a probe or skewer to ensure the cake is cooked all the way through!

4. Once cooked, leave to cool in the tin and do not take out of the tin until completely cool. Once cool, carefully remove from your tin and put onto a plate. 

5. Now cut your cake in half and cover the top of the bottom half of your cake in raspberry jam. I have been lucky enough to use my mum's home made raspberry jam but if you are not as fortunate to have any homemade kicking about shop bought will do just fine
   

6. Place the top half of the cake on top of your now jammy bottom. In my mind i have always seen bakewell cakes with the signature white drizzle on top. To do this add a generous squeeze of lemon juice to 50g of icing sugar and stir in. Keep adding lemon juice until the icing starts to become runny but stop before it becomes translucent. Simply take a spoonful of icing and hover over the cake, waving the spoon back and forth to create drizzles of icing


I have chosen to make this cake with raspberries as they are firstly, delicious but more importantly they are in season. This cake recipe is so easily adaptable with fruits such as plum, gooseberry, cherry etc. So long as you keep your sponge almond flavoured there is no reason why you can not play around with flavours. Why not have a go at making some homemade jam to really add something really special to this very simple sponge, Happy Baking! 
                                                                        

Thursday, 25 July 2013

A month of cake

Since graduating a month ago i have returned home to my job at the Rocket House Cafe. It is a place that is beautifully situated on the Norfolk coast and through the enthusiasm of my boss Vivi and my past colleague and friend Elliott, my love and knowledge of food has undoubtedly blossomed.


This month has seen me really test my baking skills, first mastering mass catering. I do not care what anyone says it is bloody hard to cater for 70/80 people, even with the simple theme of a mad hatter's tea party! My poor friend Liv came for a visit and ended up being roped into making millions of chili jam sandwiches, mini stilton and walnut scones and icing a moustache cake. 

All in all we made some really delicious quiches, heart shaped sandwiches, scone canapes, cupcakes, meringues as well as many other things. Seeing it all on the table made all the hard work worth it and it was especially lovely as it was for my friend Vivi's 30th birthday allowing her to enjoy her party without the worry of all the cooking. 

Although the heart-shaped chili jam sandwiches looked beautiful, i did feel slightly guilty when one or two children went to take a bite, what they thought was a sumptuously sweet raspberry jam sandwich and then got a large dose of chili!

This was only my second weekend home and my baking has continued in the form of pasties, millionaire shortbread, rocky road and more. My wednesdays see me take myself away from the cafe and dedicate 9 hours of my day cooking 35 cakes for the cafe as well as a selection of treats to tempt the summer visitors to Cromer. One of the treats i created was our 'Cake of the Week', a orange and almond cake with pistachio and crystalised rose petals. I am completely in love with this cake as it is beautiful to look at and incredibly flavoursome. As many of you have seen from my previous recipes i really love using pistachios in my baking and i will be posting the recipe for my cake very soon.

I once again delved into Dan lepard's 'Short and Sweet' recipe book and found a great recipe for a bread dough which he used to make pasties. By using tomato paste in the dough the colour of them was amazing once they were cooked and gave a great flavour often lost when overpowered with interesting fillings. I always think as much care should be taken with pastry and bread as taken with the ingredients you put with them. 

As you can see it has been an incredibly busy month for me, hence the large gap in my blog but i have an abundance of recipes from these experiences which i am looking forward to sharing with you all. Despite my culinary experiments this month, many who know me well would not say my creativity has been limited to my cooking, my creation of a jellyfish costume for the party using only a sombrero, scraps of material, newspaper and LED lights was pretty special. Not only did i subject my friend Liv to an obscene amount of cooking, i also forced her to look like a complete fool with me for a whole evening! 

Tuesday, 14 May 2013

Iberico Restaurant Review


All Images © www.ibericotapas.com


I have been to Iberico tapas a few times now, and I cannot recommend it enough! In the heart of Lace Market, it is easy to miss but it is somewhere that is definitely worth seeking out.  Situated in a beautiful grade II listed building, the restaurant has a wonderful relaxed atmosphere with a simple but welcoming interior.

The key to great Mediterranean food is simplicity and putting together good ingredients that taste and look great. Iberico boasts all the dishes commonly associated with Spanish cuisine such as; Potatas Bravas and Gambas a la plancha. However, differing from traditional tapas, Iberico uses a vast range of ingredients and international influences, elevating simple tapas into elegant and exciting dishes.

If you are vegetarian there is a great range of dishes including Goats cheese stuffed Piquillo Peppers with Spinach, Honey and Hazelnuts and Chestnut Cavallo Nero. Any good Spanish menu worth its weight always has a beautiful paella dish on its menu and Iberico’s certainly doesn’t fail to deliver. For fish lovers I would also recommend the Hake with Green Olive and Lemon Salsa as well as the Scallop with butternut, orange and chorizo jam.  However, my favourite dishes have to be the slow cooked lamb rump with spiced aubergine, yoghurt and mint and the crispy pork belly with celeriac and rhubarb.  Iberico also offers amazing charcuterie and cheese boards with a range of delicious homemade breads. If you are able to manage a desert the churros with chocolate sauce are the perfect way to finish your meal!

The price range of each of these dishes is from £5-£7 but if this seems a little pricey there is an express lunch offer between 12pm and 2pm, Monday to Friday for £11.95. For this you get, Catalan bread, 2 tapas dishes and dessert. The portions of each dish are a good size and you easily get your moneys worth in the quality and quantity of the food. For those of you looking for a big hearty meal this is possibly not the place for you. This place is perfect for groups of friends looking to try something different and is a prime example of the wonderful independent restaurants Nottingham has to offer. They are open everyday apart from Sunday offering lunch service between 12pm and 2pm. They have evening service between 5.30pm and 10pm Monday to Friday and 6.00pm to 10pm on a Saturday. I would recommend booking before hand, as this place gets busy!

For more information visit Iberico’s website: http://www.ibericotapas.com/.